¶ install-servos-in-fuselage
¶ Tools required
- UHU Por glue
- spatula
- (1.2mm drill)
¶ Parts required
- Servos with assembled servo arm
- servo push rods
- 4 rudder horn + 12 piece of 2x12 Spax screws
- (optional: flexible tube)
¶ Prepare the rudder rods
If you are using servos larger than the cutout size, e.g. HiTec servos,jump to the Step after "Repeate the process with all rods".
-
Cut two 150 mm and two 75 mm long long rods
-
Cut off 8 x 15mm long tube pieces and put the tube on one end like in the picture below
-
Now bend the wires with the tube
-
Now the other side like this that the rod looks like an elongated "Z"
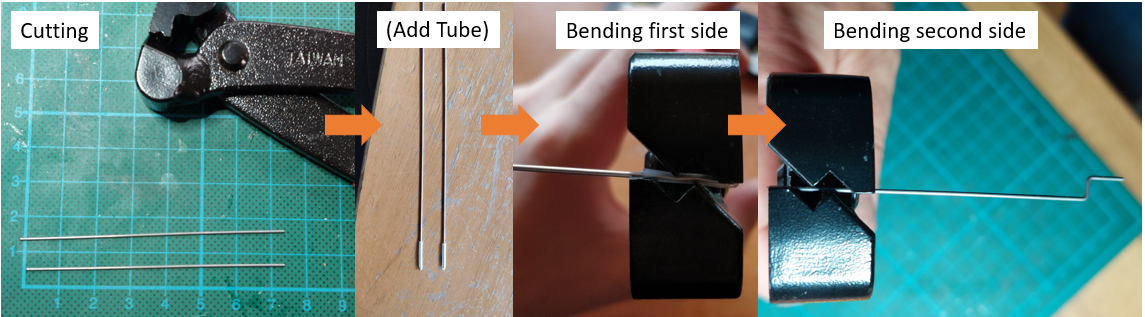
-
Repeat the process with all rods.
when you use larger Servos, or don´t know how long the rods should be, do this:
- Place the servo in the cutout, fix the servo horn movably with a screw. (see the next two chapters "Installing the Rudder horn" and "Preparing the Servos")
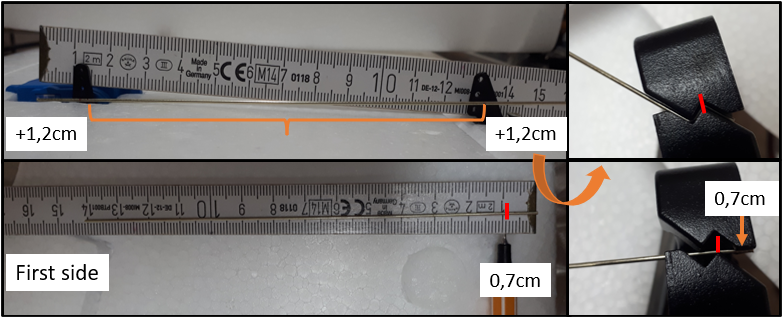
- Measure the distance from the servo horn in center position to the rudder horn. Add approx. 1.2 cm to the measured distance on each side for the connection bend.
- Cut of a piece of the servo push rod (for the HiTec = ca. 14,1 cm)
- Mark the bar with a pencil at approx. 0.7 cm
- Place the bending pliers as shown in the picture below (First side) and bend a "Z".
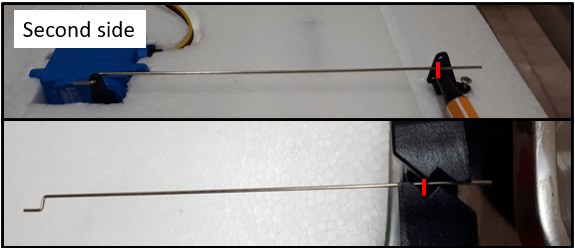
- connect the rod to the receiver on the servo, and mark the rod at the level of the hole in the rudder horn (See picture "Second side")
- Apply the bending tool as shown in the picture and bend the second side of the bar into a "Z". Make sure that the first "Z" faces the same direction when bending.
¶ Installing the rudder horn
To prevent the connecting rod from wobbling in the rudder horn later, either the hose (see above) can be pushed onto the rod, or a hole with the diameter of the rod (1.3mm) can be drilled in the rudder horn. Here, the variant with the drilled hole was used, since the hose makes it difficult to push it into the hole.
Insert a screw (e.g. 2x12) through a single hole and attach the backside loosley, and let it dangle like shown in the following pictures.
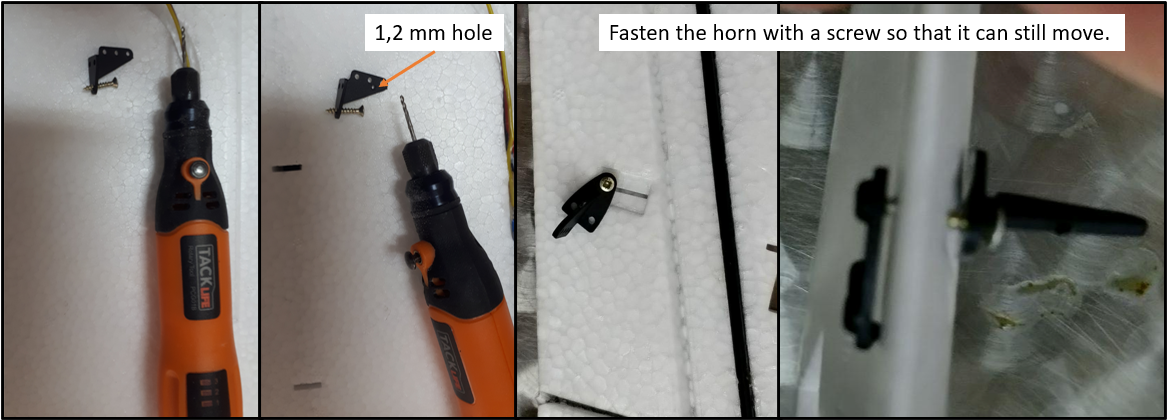
Do the next step only after you have threaded the servo rods.
Put UHU poor on all surfaces, wait 10 minutes and press them together. Pay attention that the upper part is aligned properly.
Install the remaining screws.
¶ Installing the servos into the Wings/V-Tails
¶ Preparing the Servos
Make sure the servo is centered before installing the servo into the wing/v-tail.
.jpg)
If you are using the HiTec servo, there is a mark on the gear of the servo, if it points towards the cable, the servo is in center position.
Nevertheless, the center position should be checked with a calibration device or by means of control.

¶ Approach for cutting cable channels
Its possible to use a nail+pliers and a candle to create a hot cutting instrument.
This way is nice to cut cable channels.
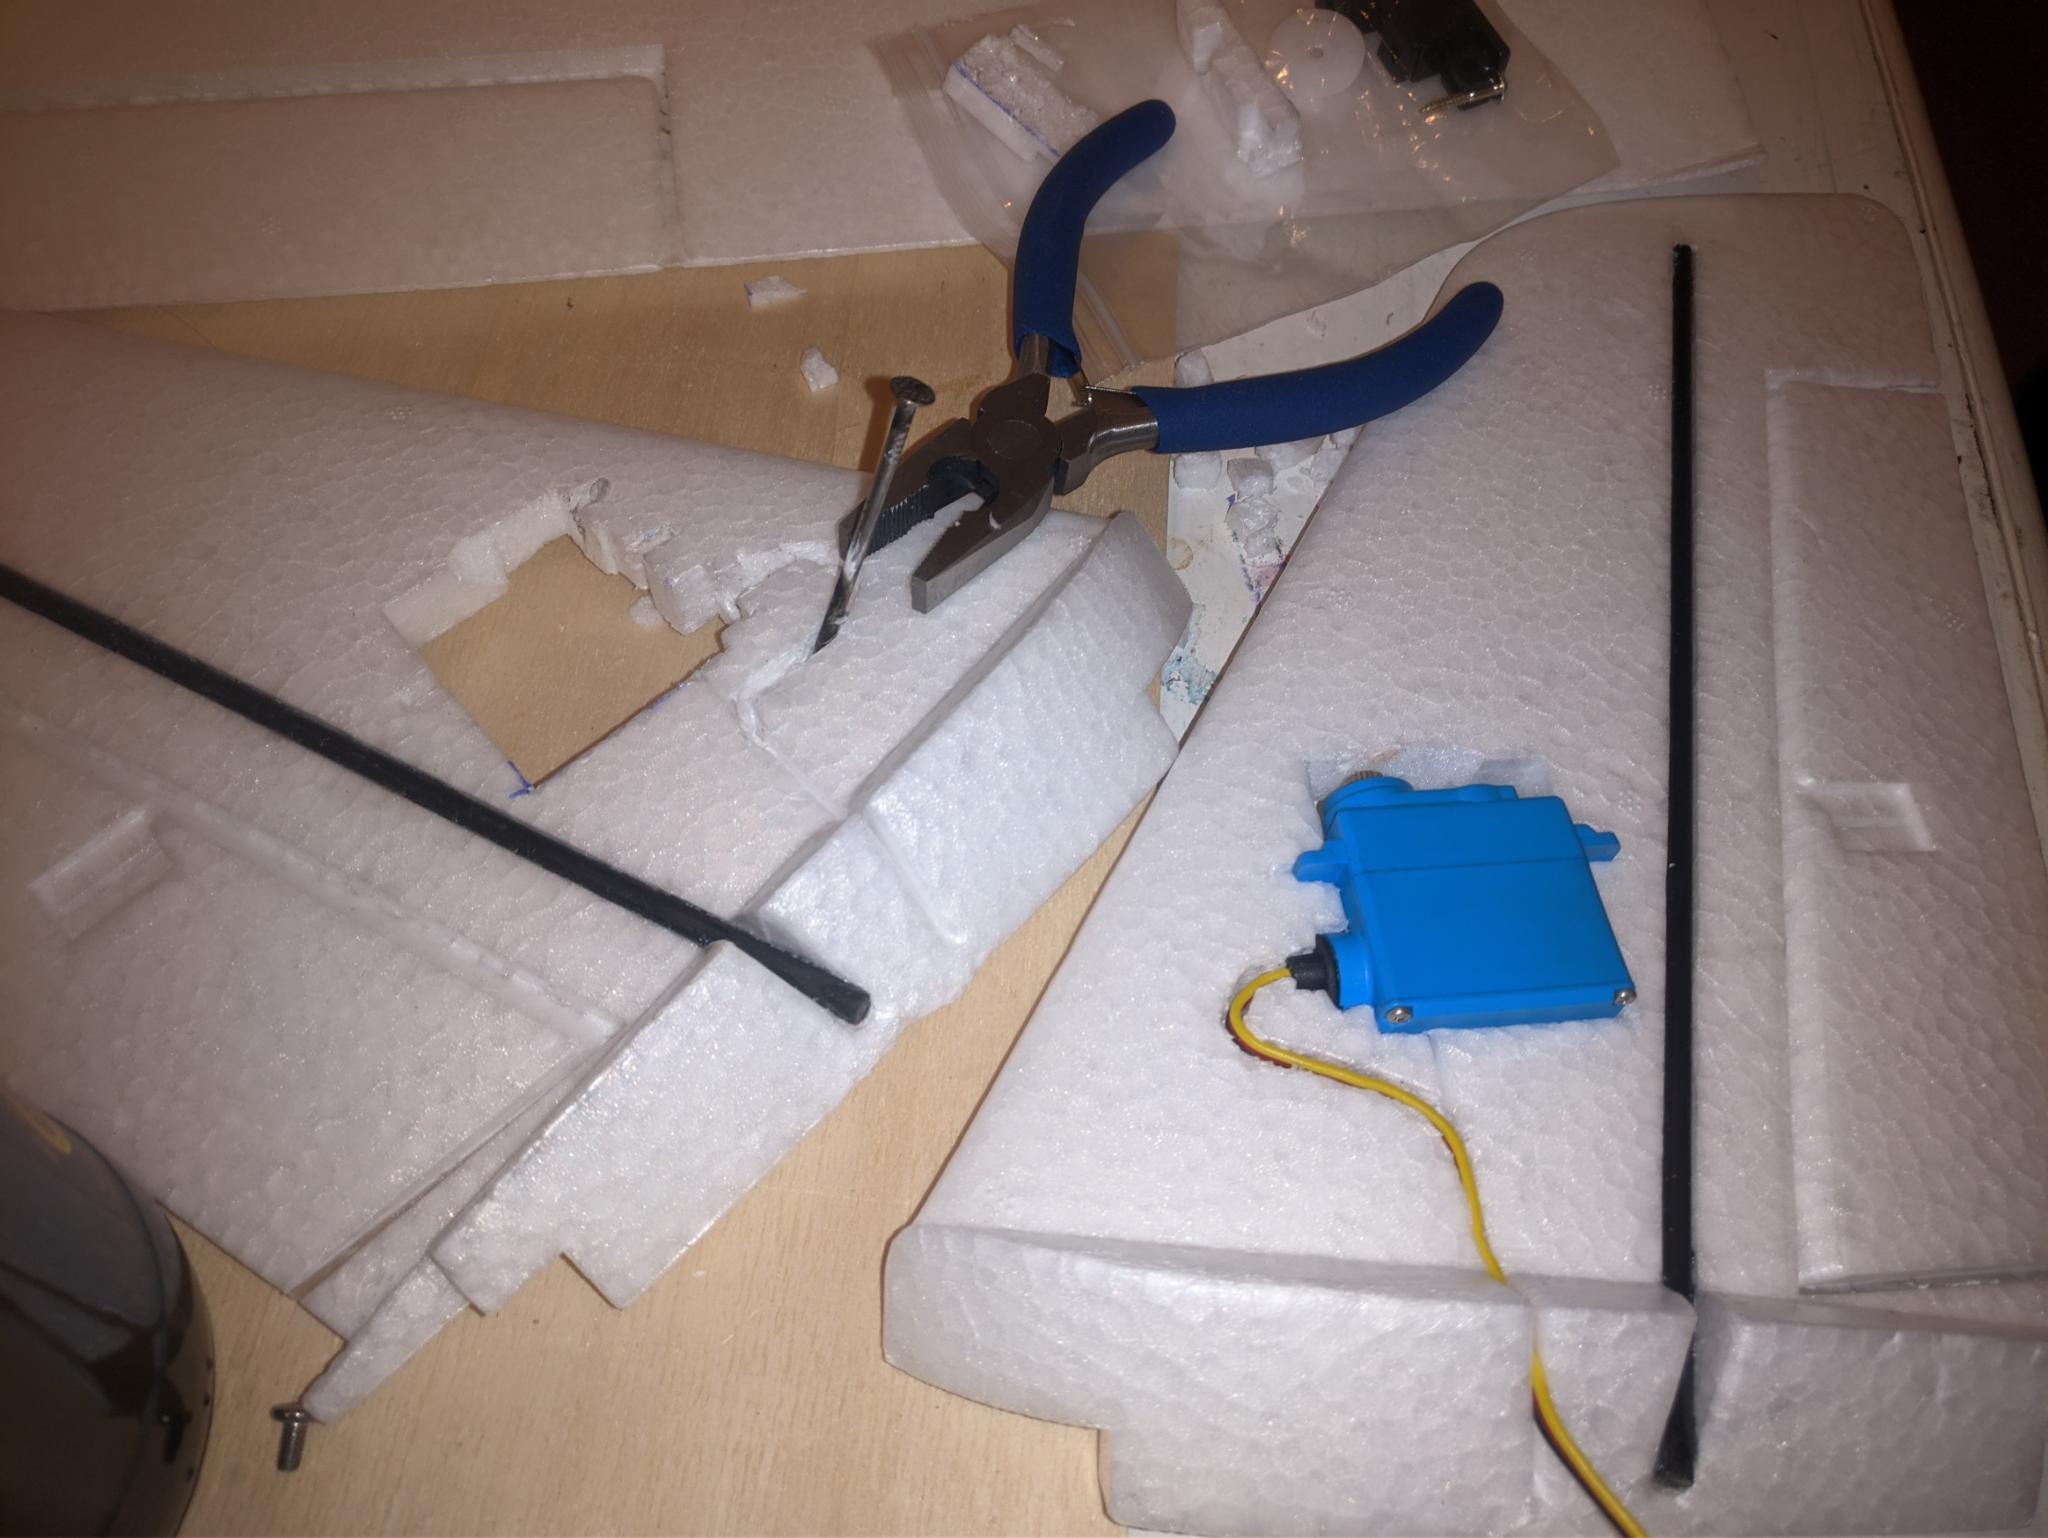
Alternatively, the channel can be cut out with a piece of wire, which is made hot, or with a cutter knife
¶ Installing the servos in the main wings
Before continuing with glueing the servos and cable into the wing make sure the carbon tubes are inserted into the wings.
There is a right and wrong way:
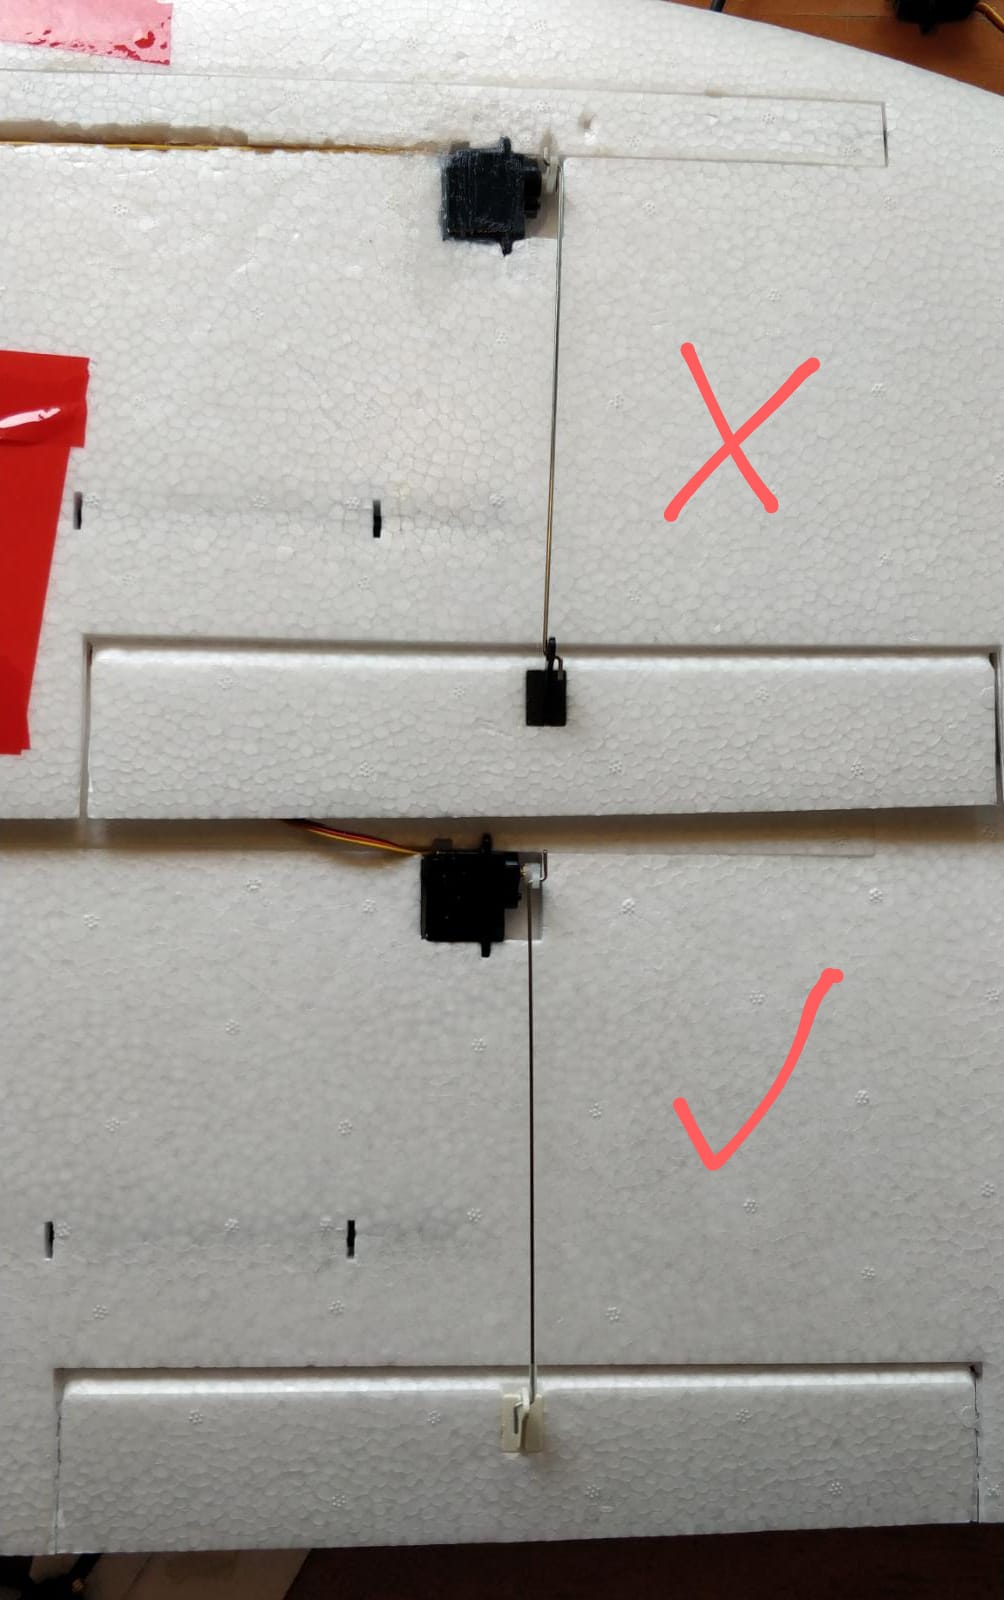
- insert the servo without glue into its place and its cable into the cable channel
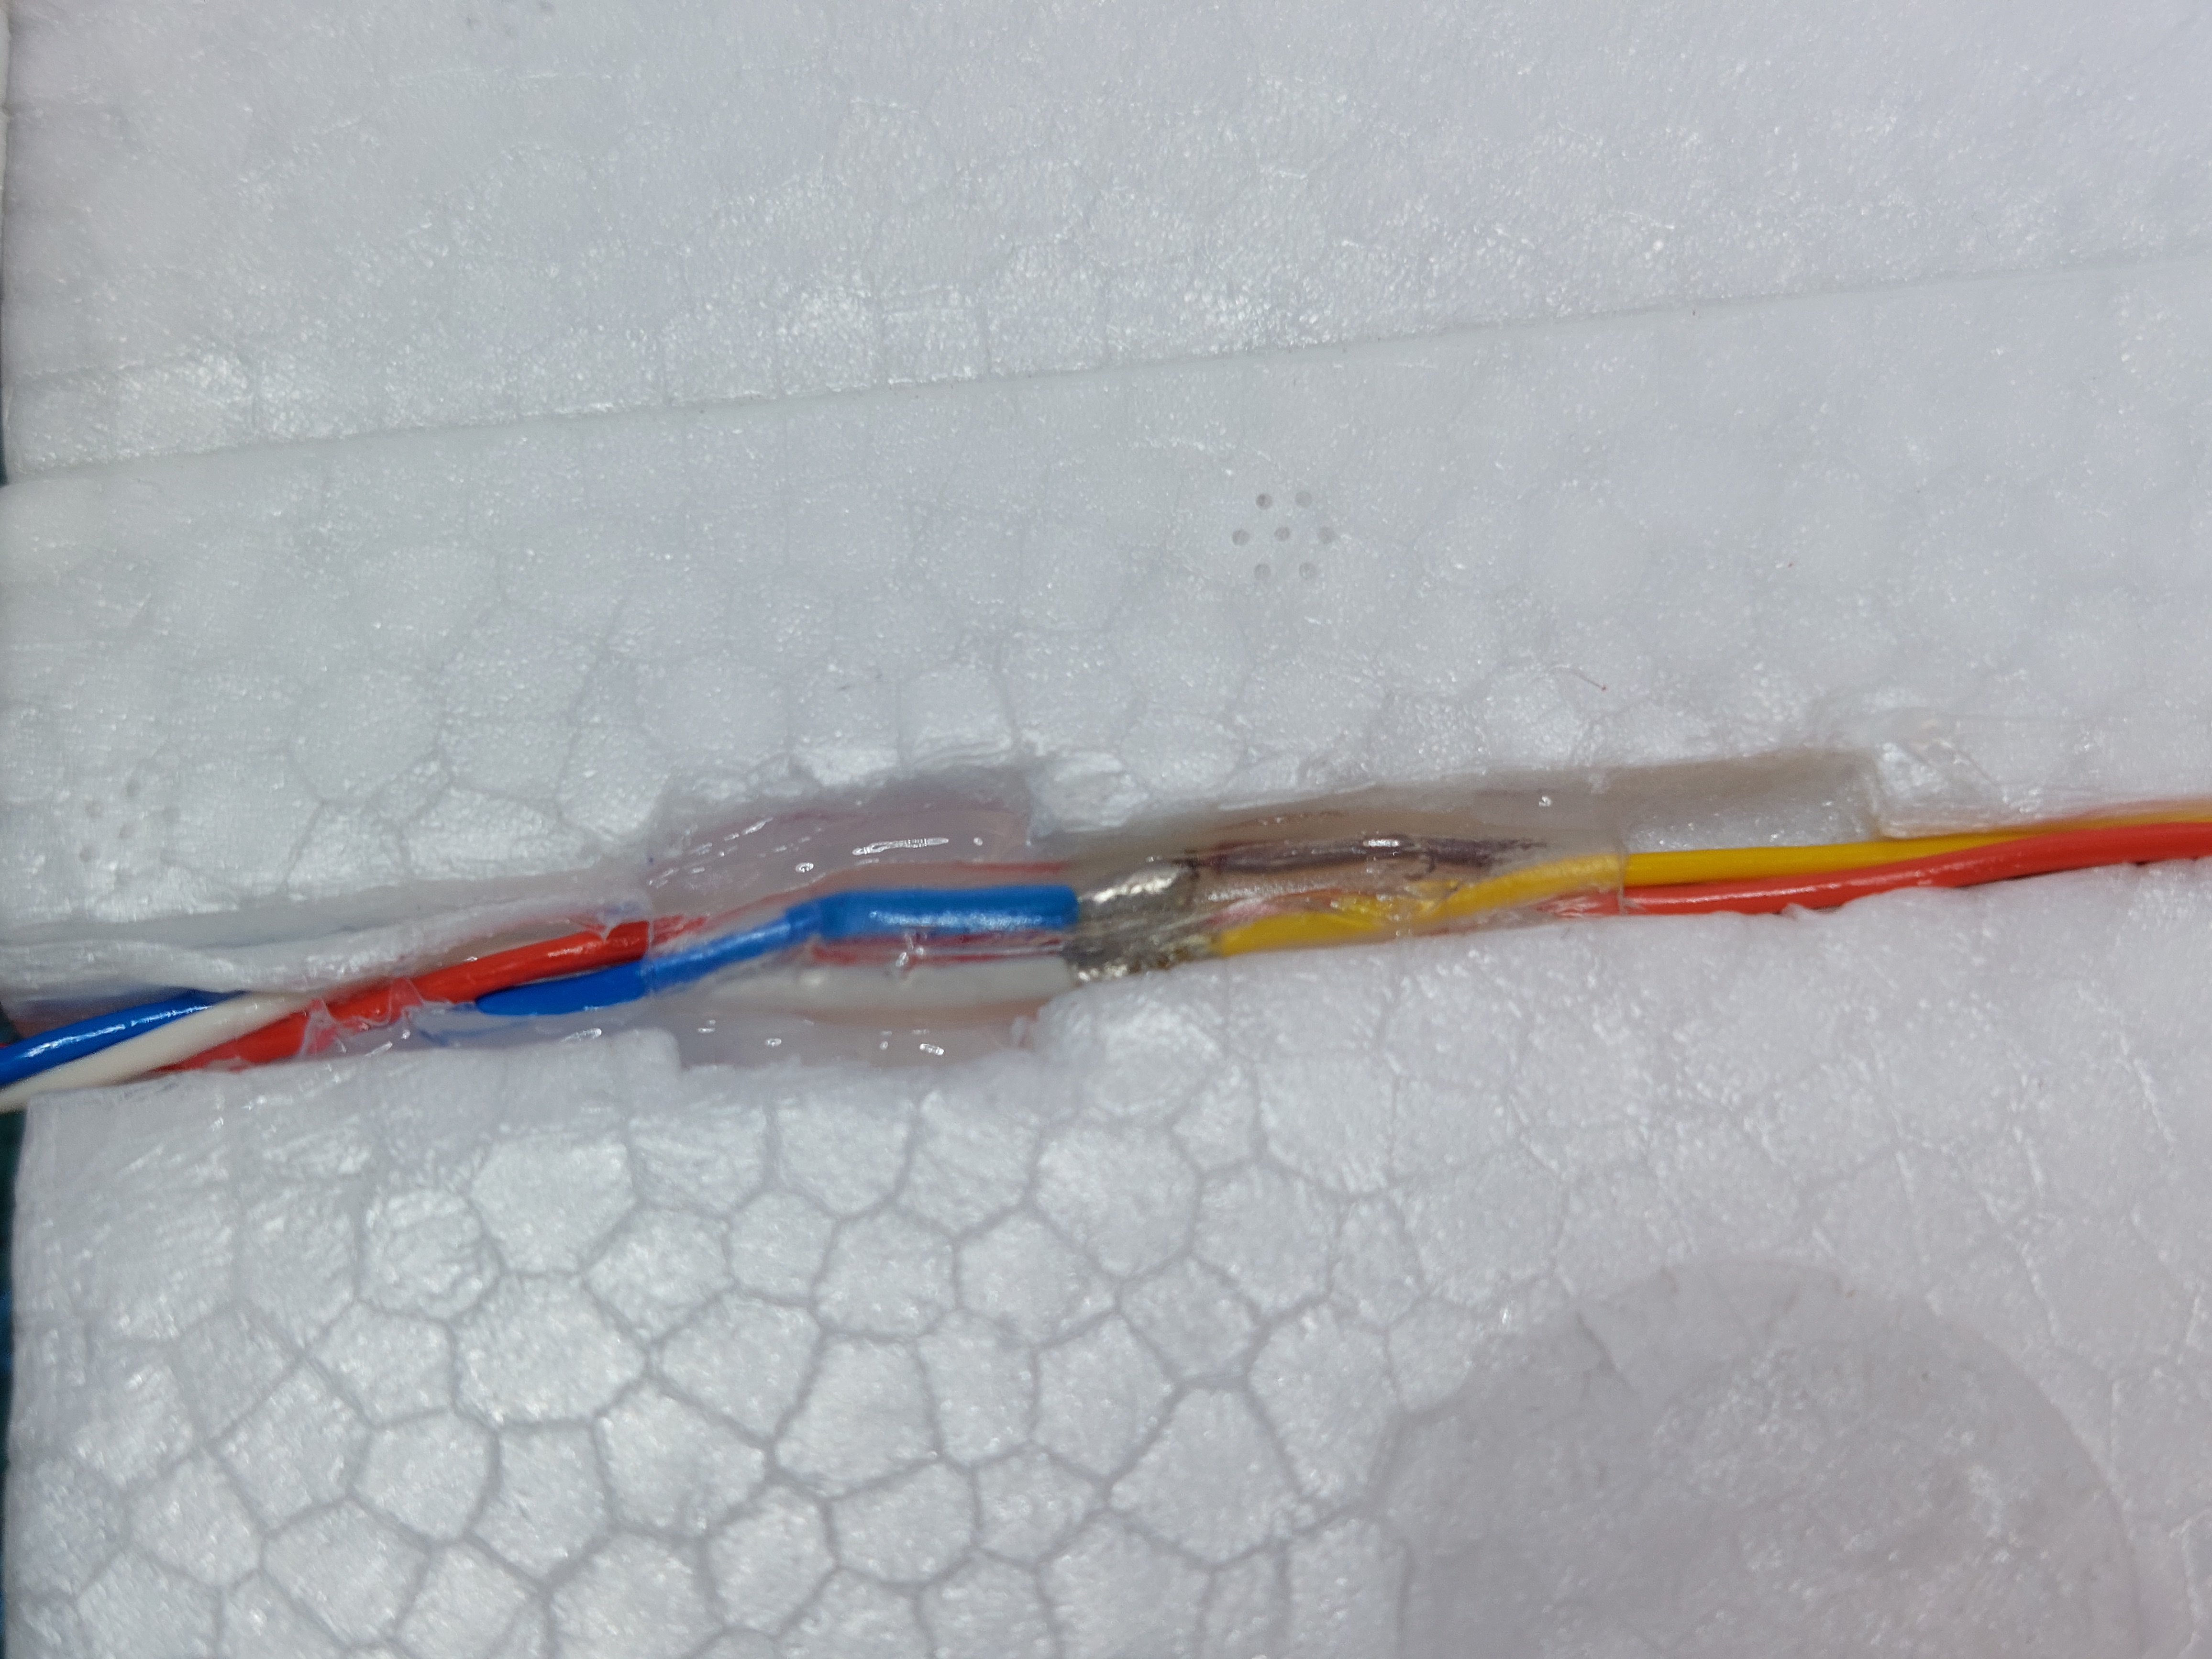
- mark the location where the servo wires are solderd to the M-Plug-Wire, remove the cable and use a cutter knife in order to make room for the cable. Something similar to this:
- make sure that the servo horn is screwed into the servo
- apply uhu por into the previously cutted "kabelkanal" and into the designated servo mounting place
- wait 10 minutes and press the servos into the mount
¶ Installing the servos in the V-Tails
¶ Mount the Servos
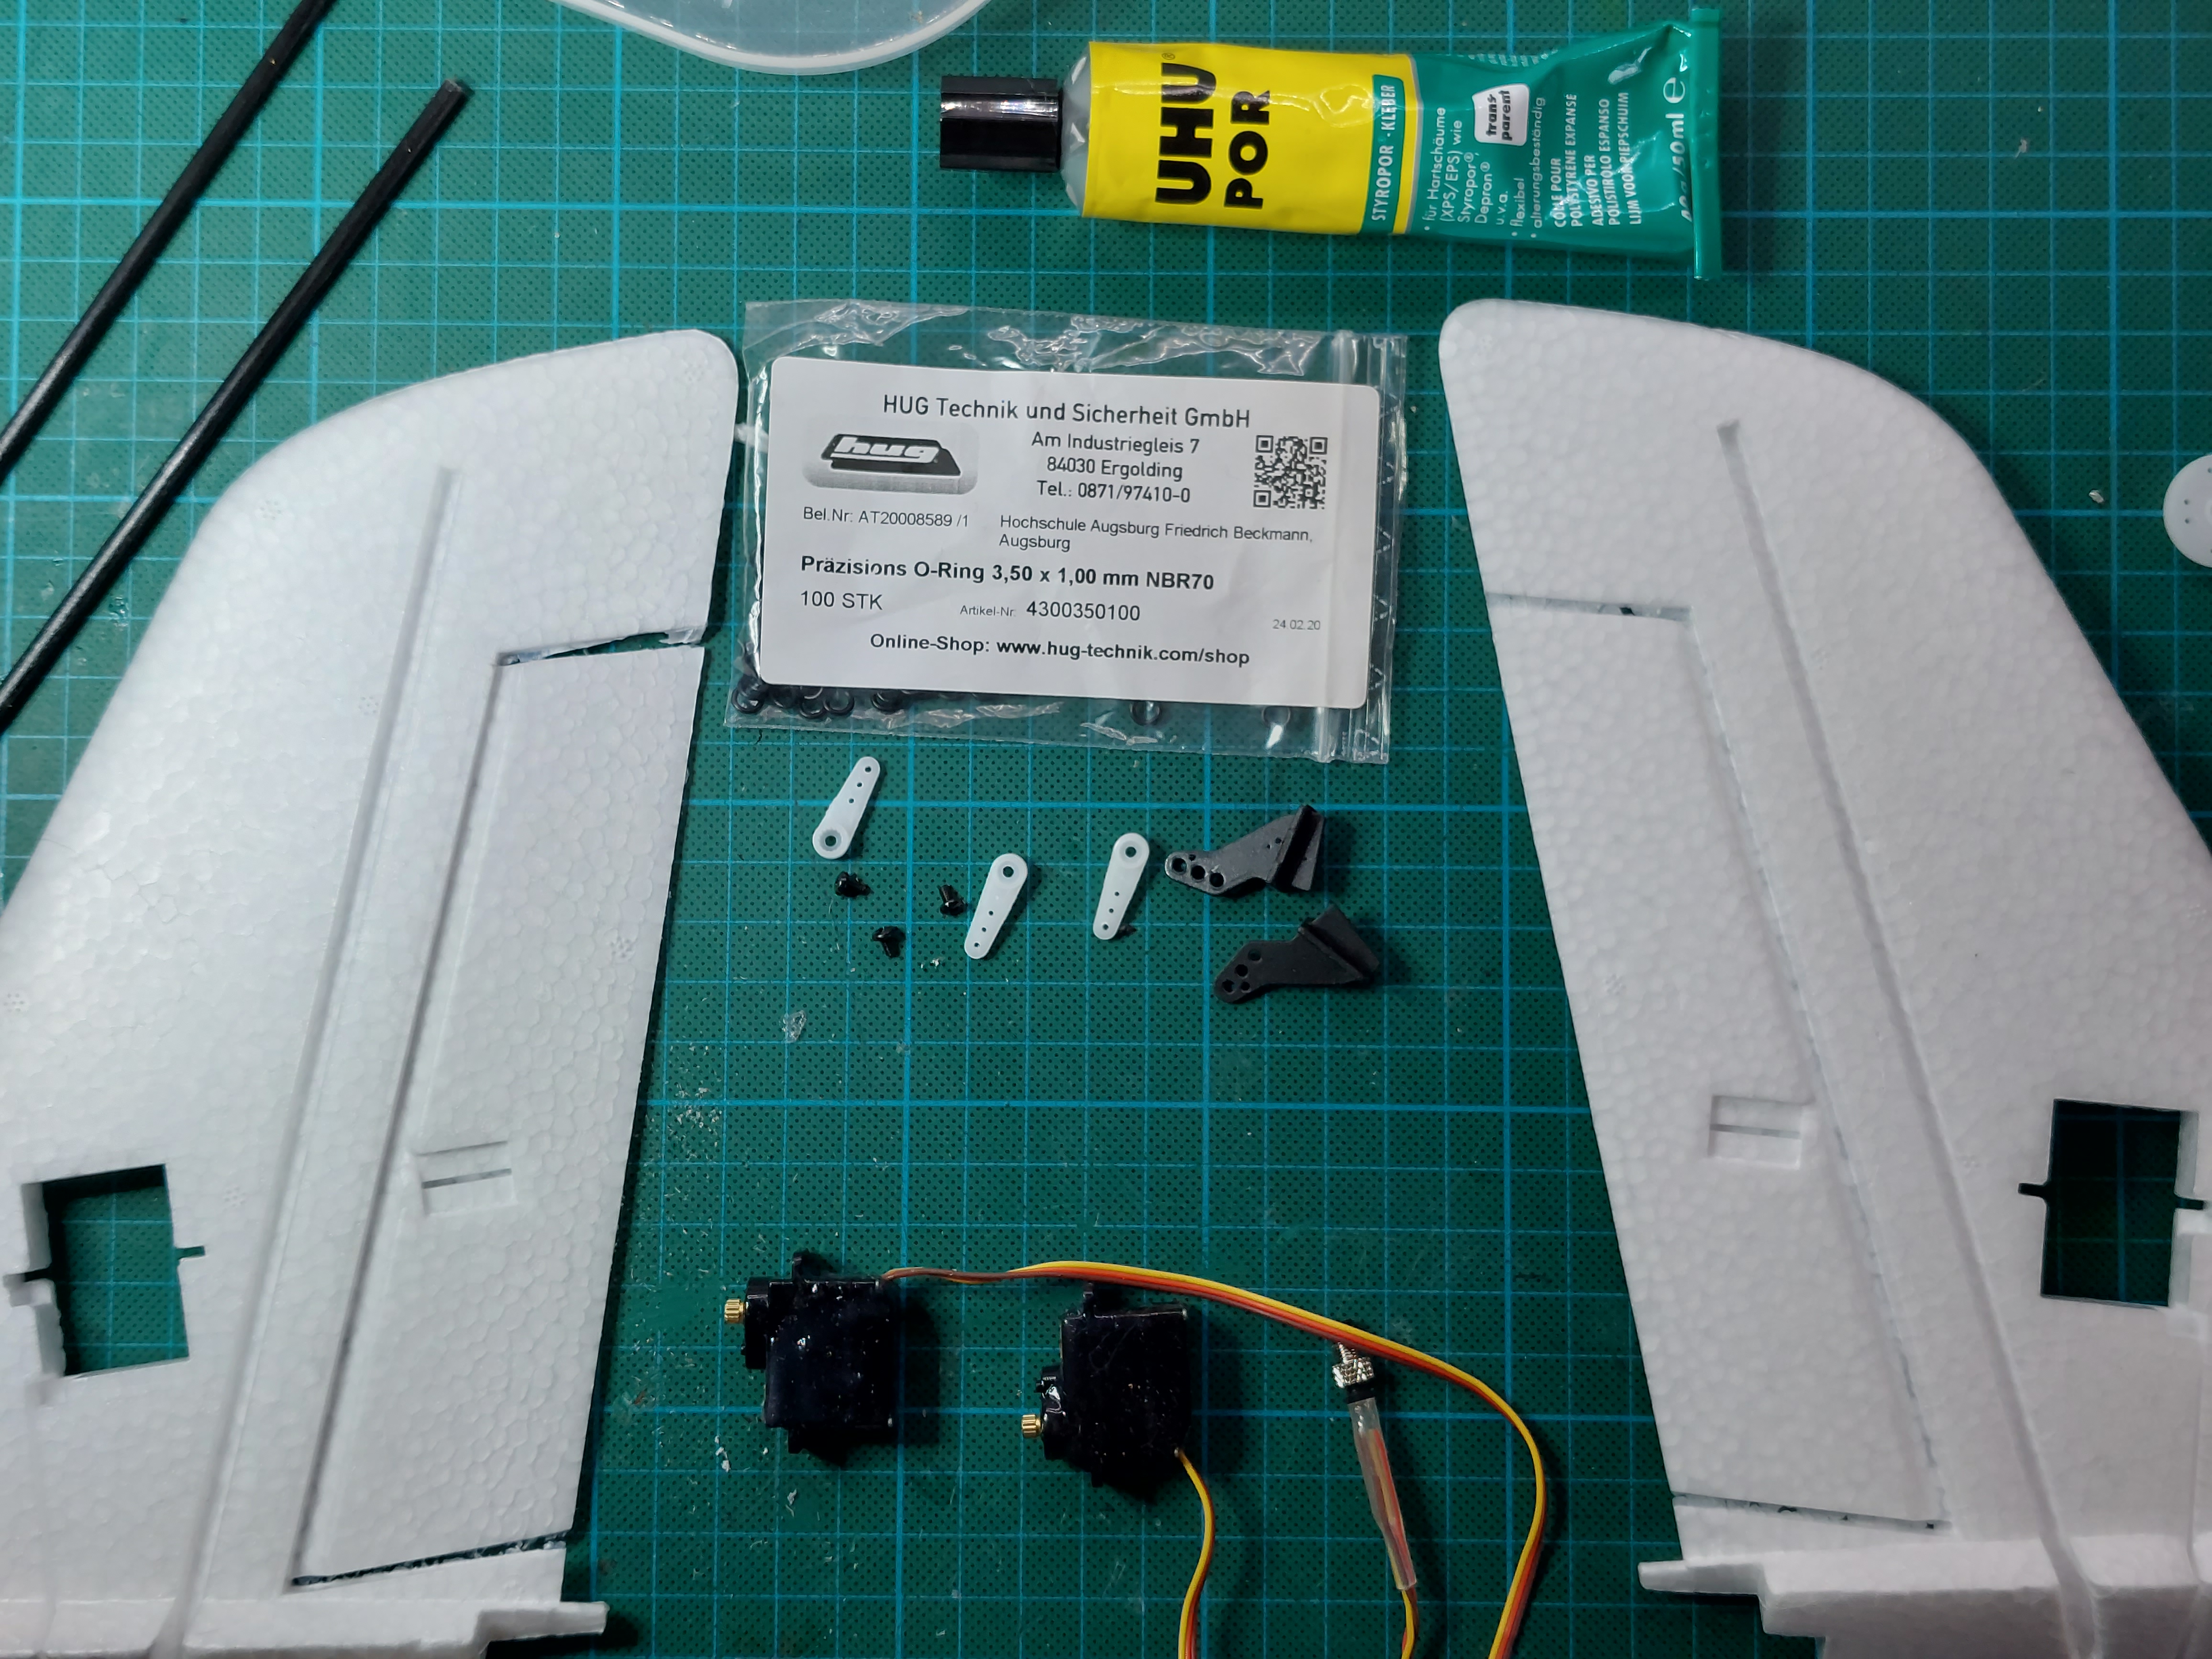
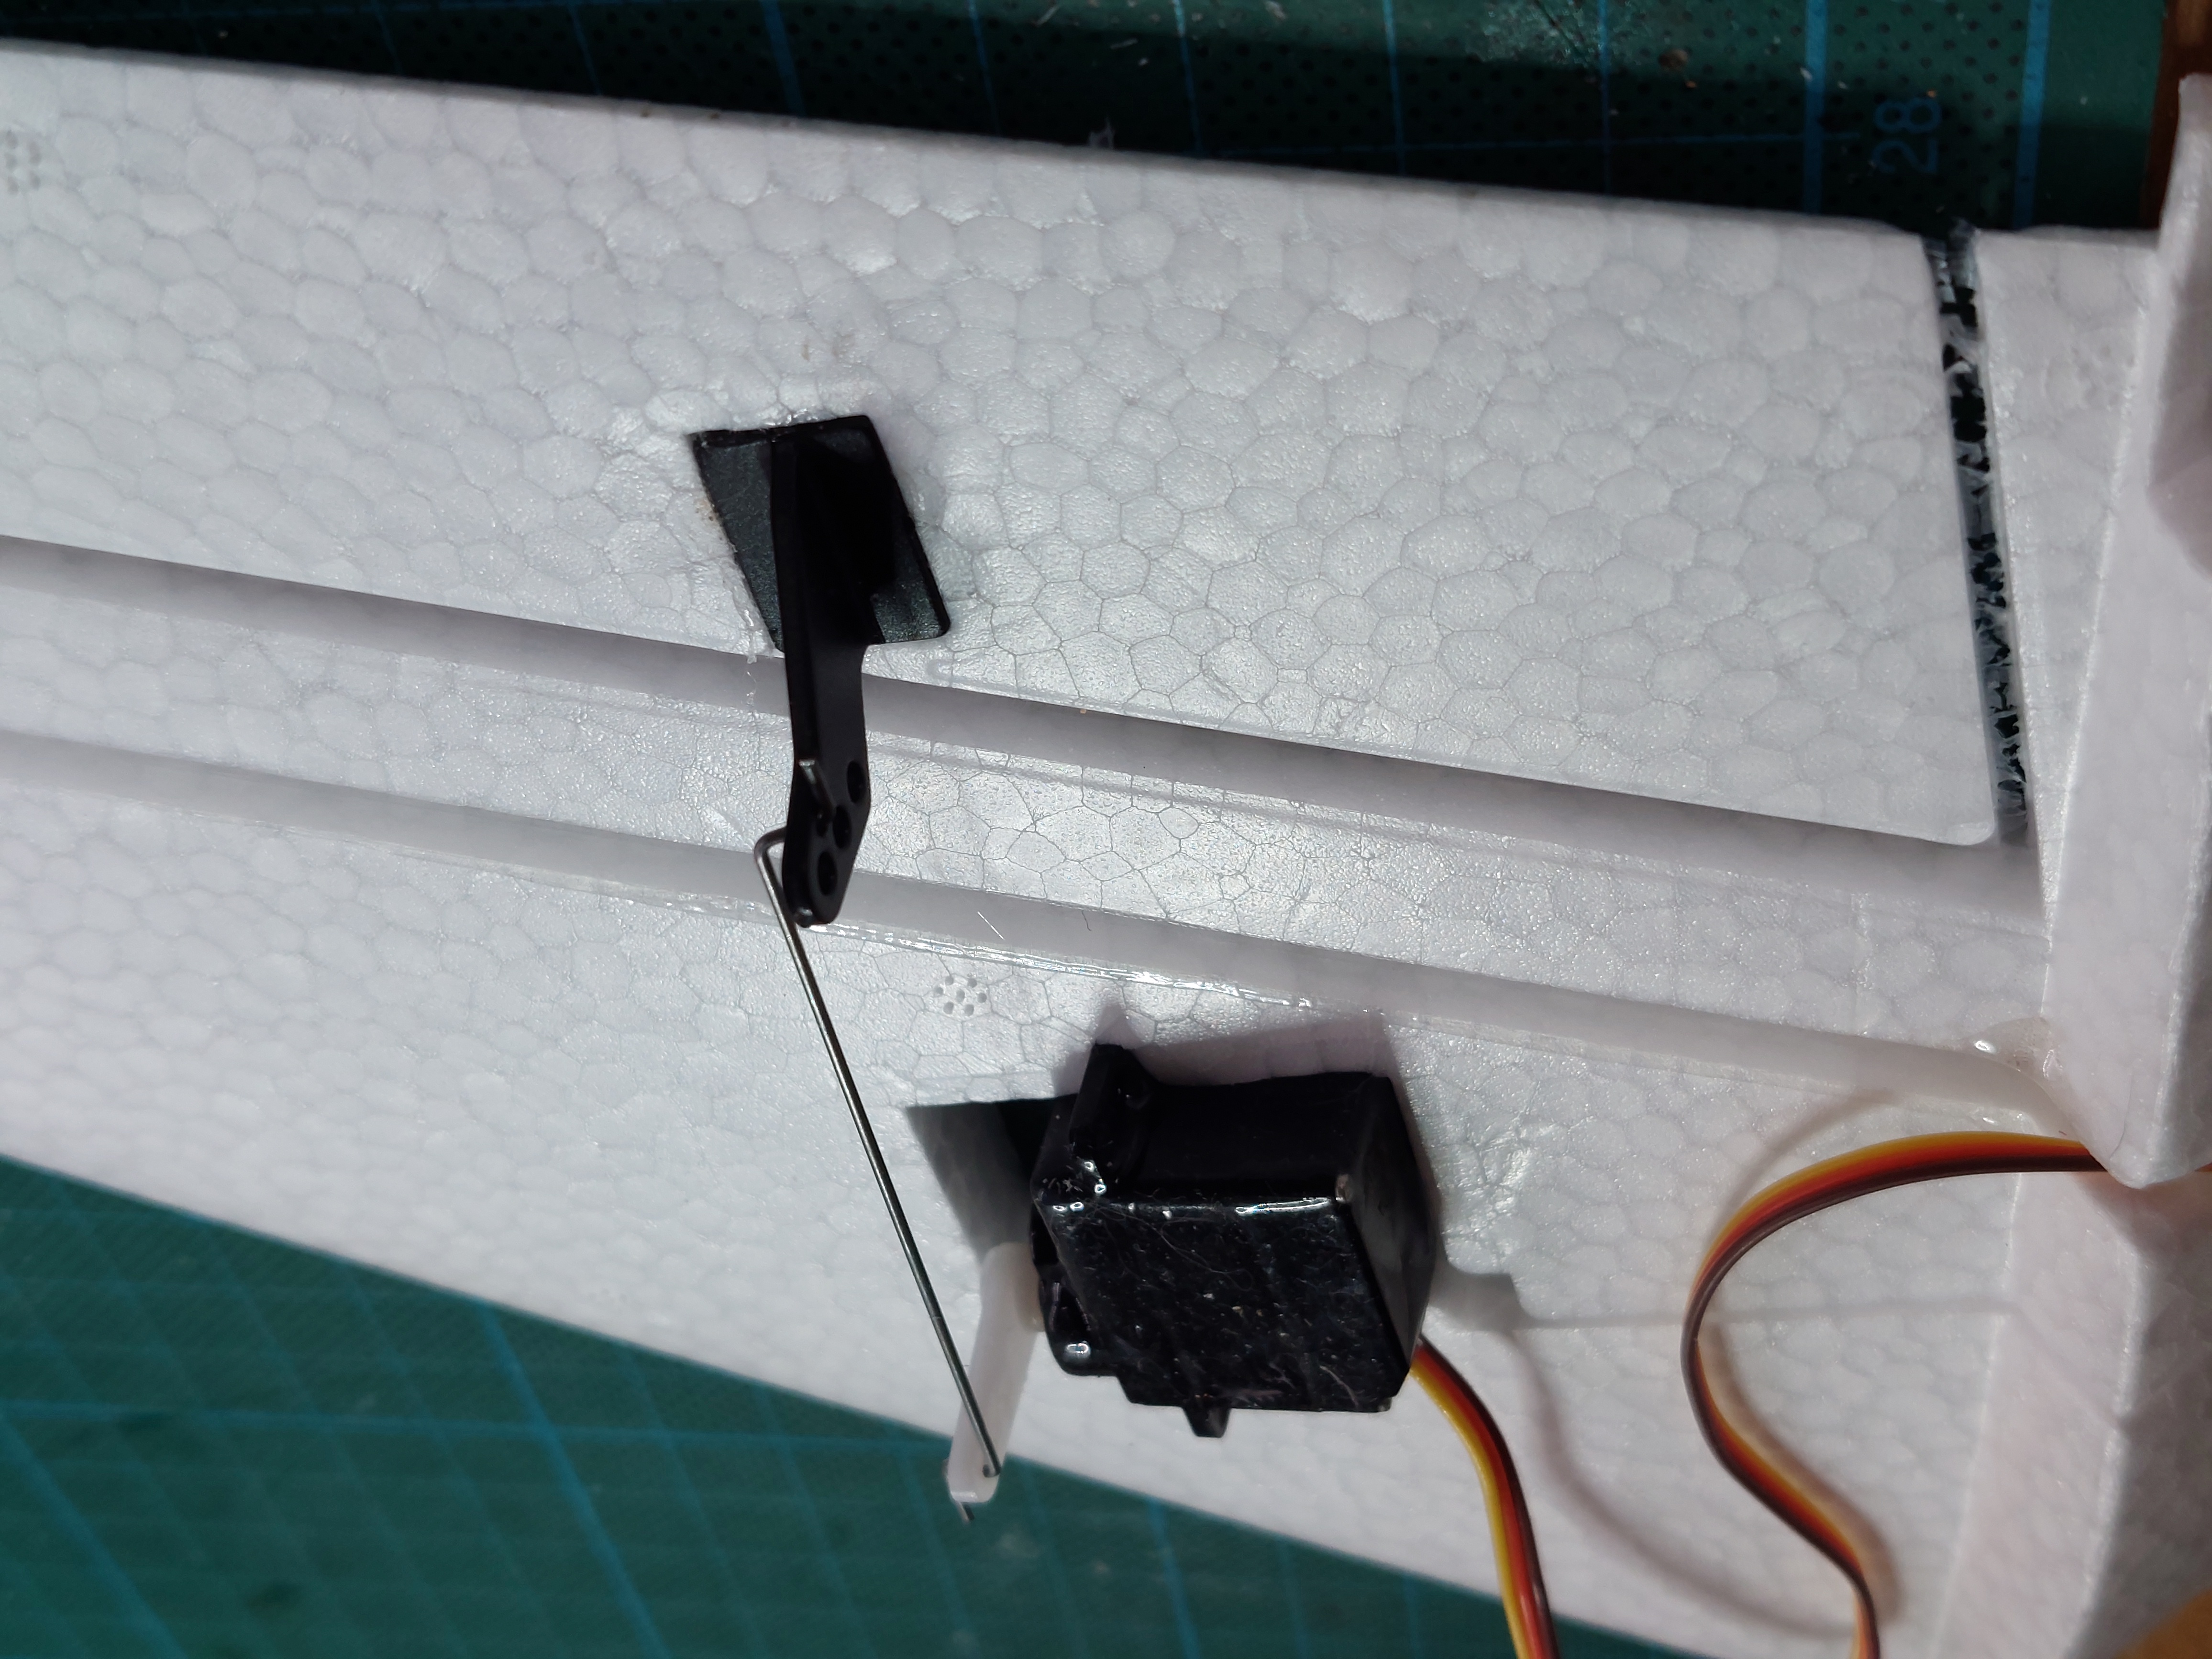
¶ Adjust servo horns
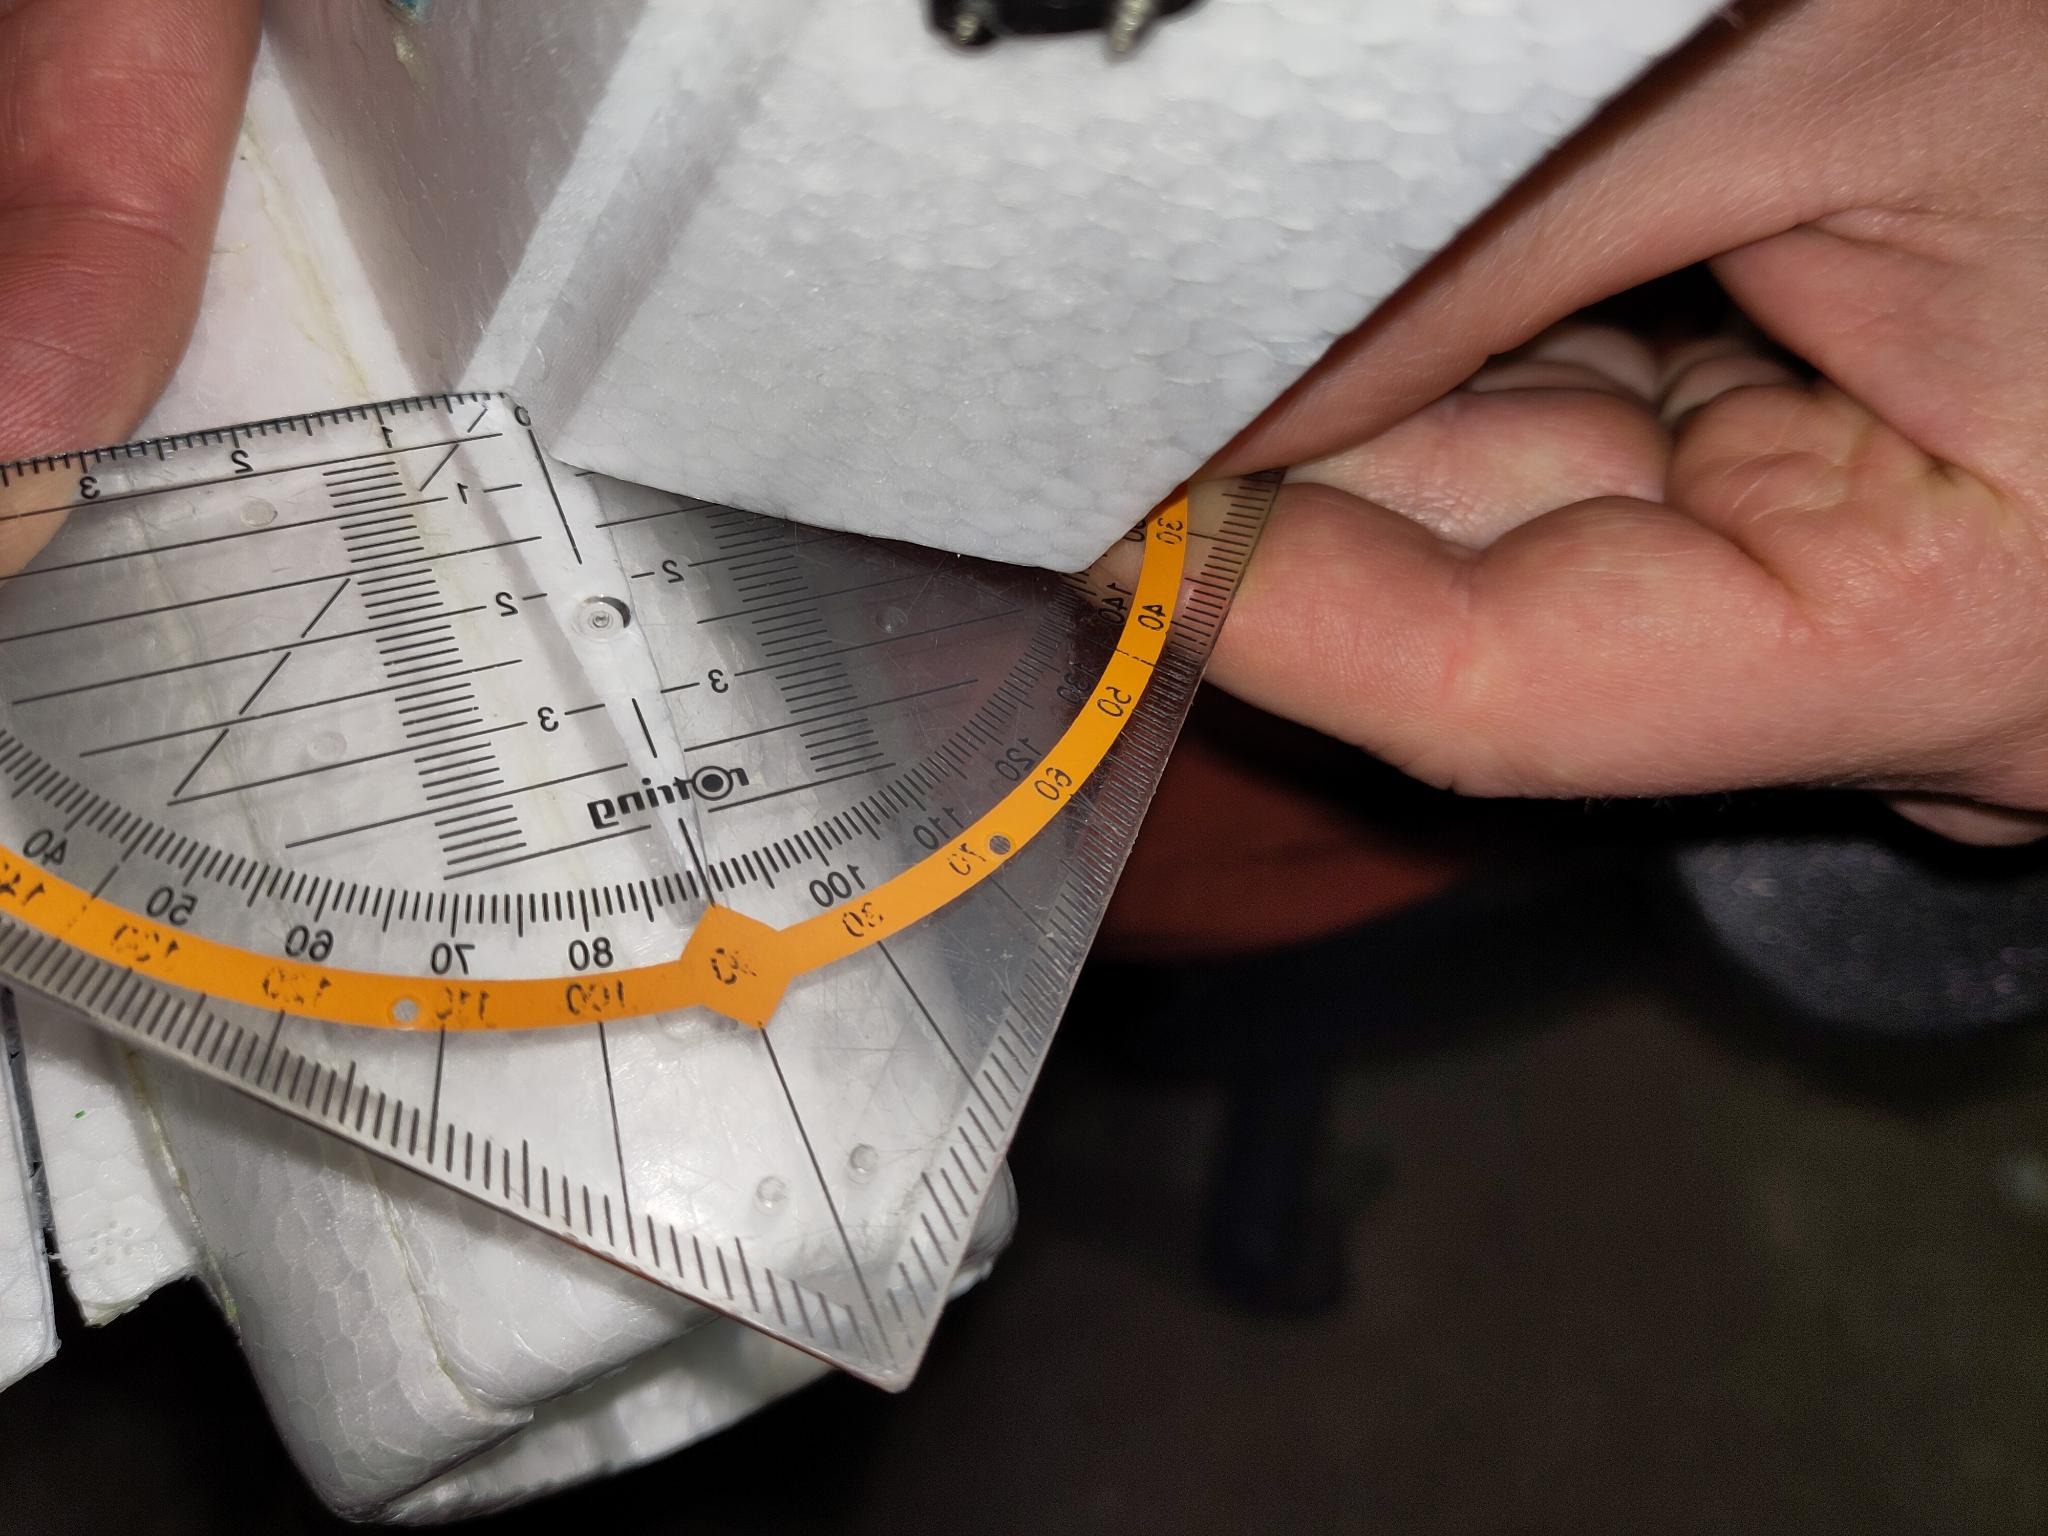
- Target Angle UP : 35°
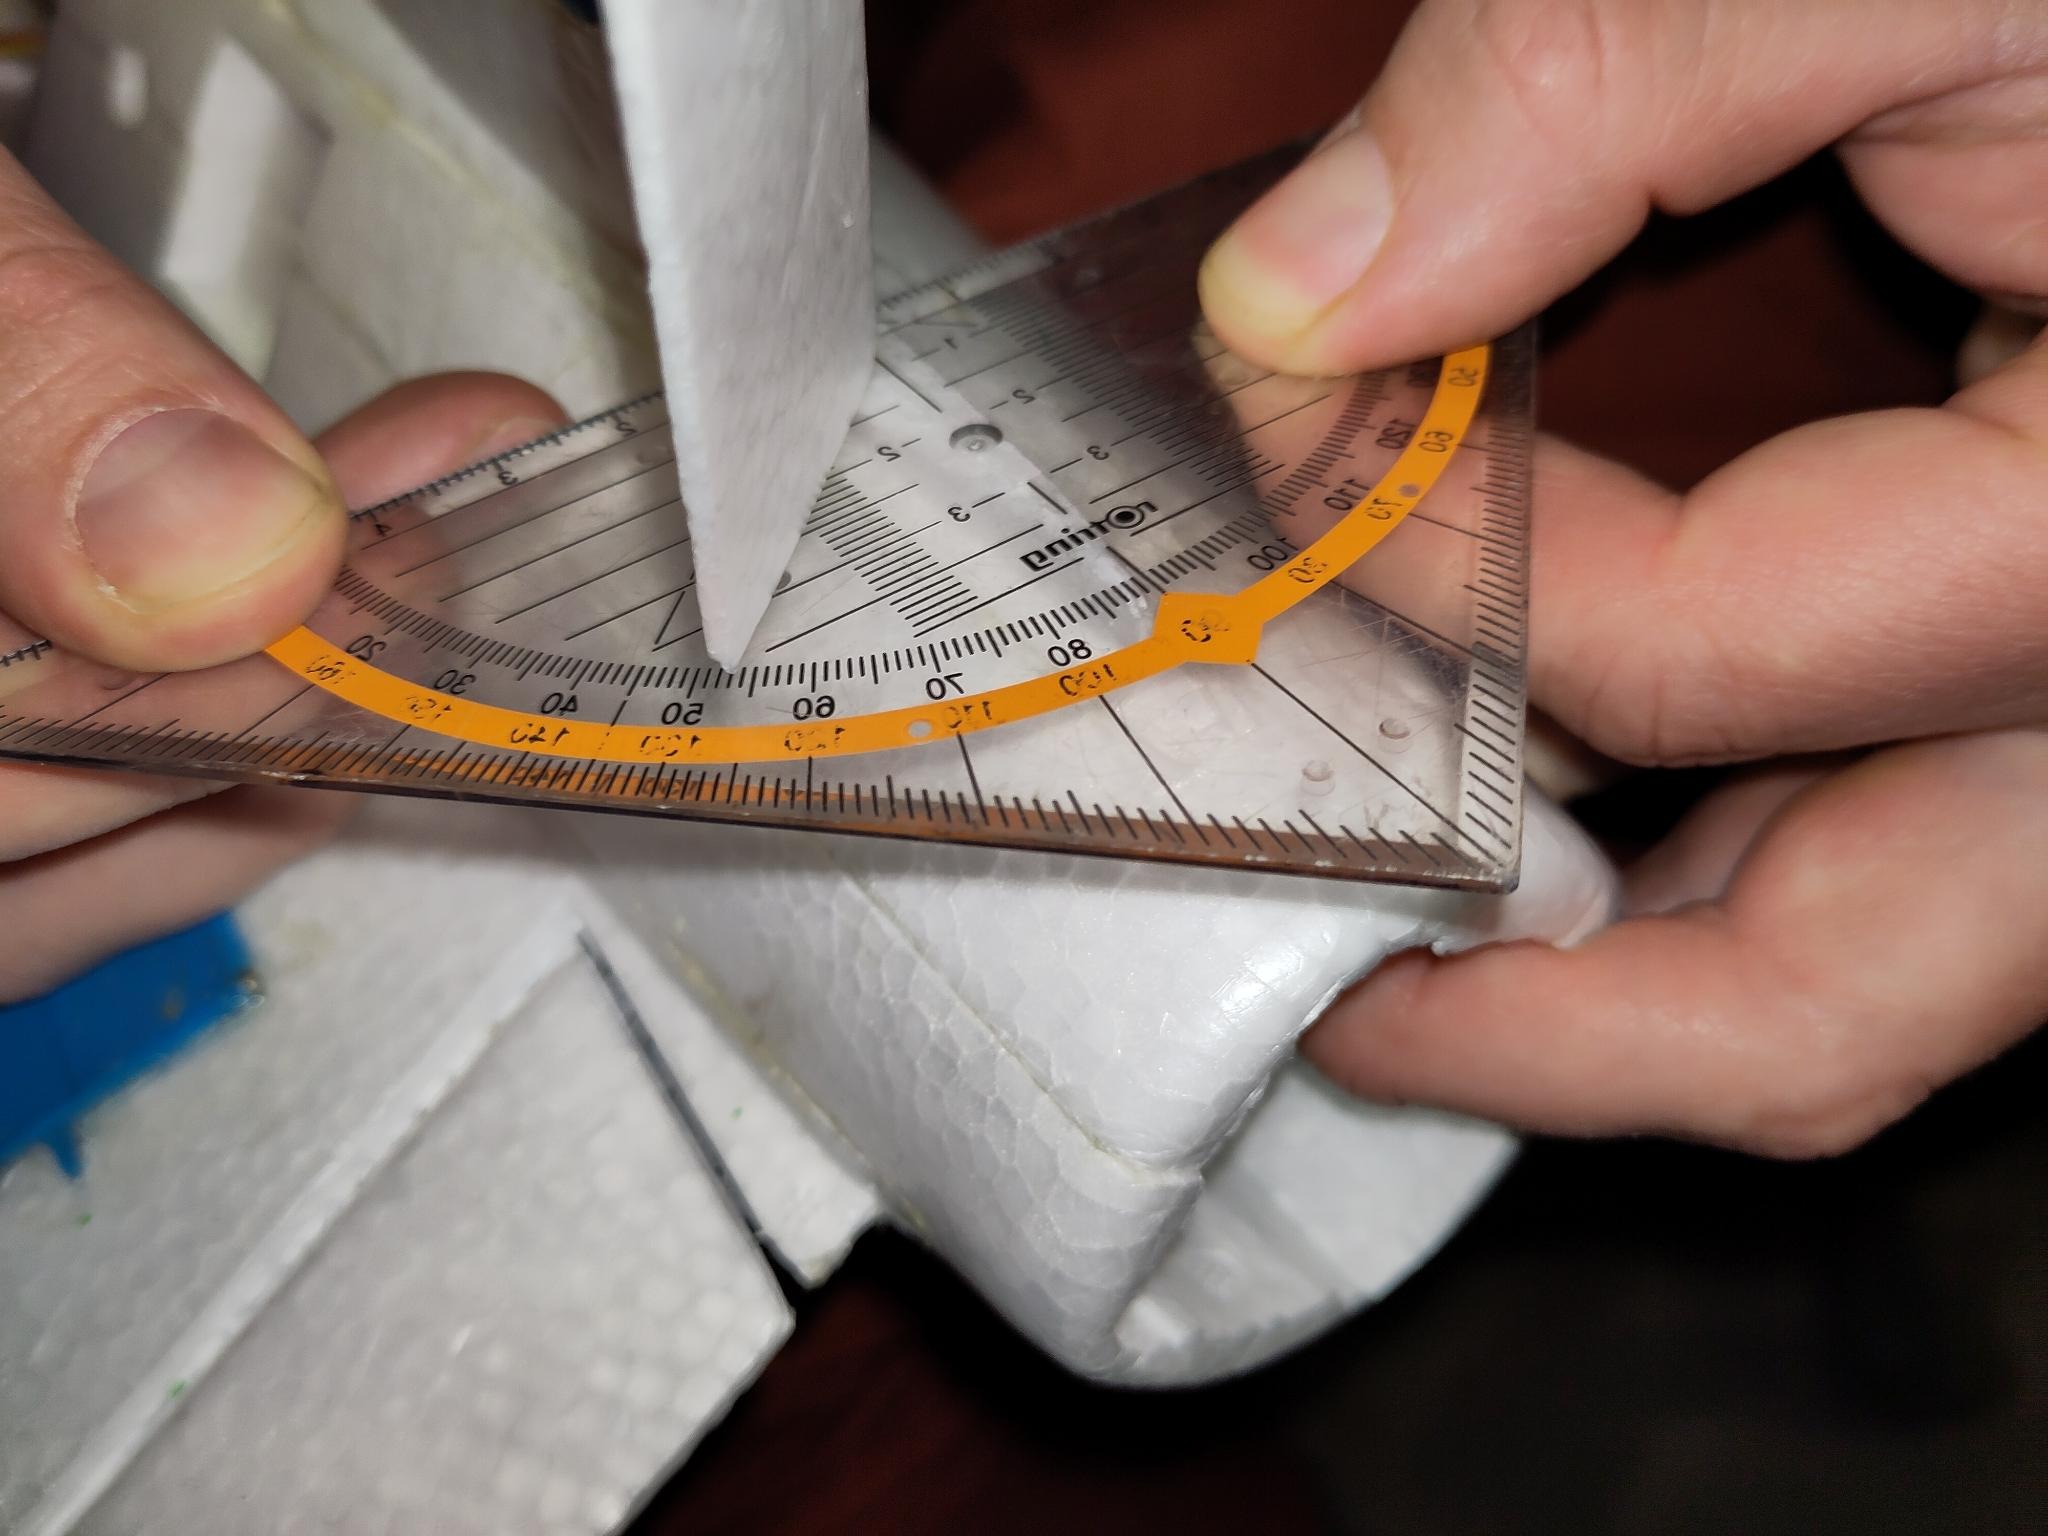
- Target Angle DOWN: 42°
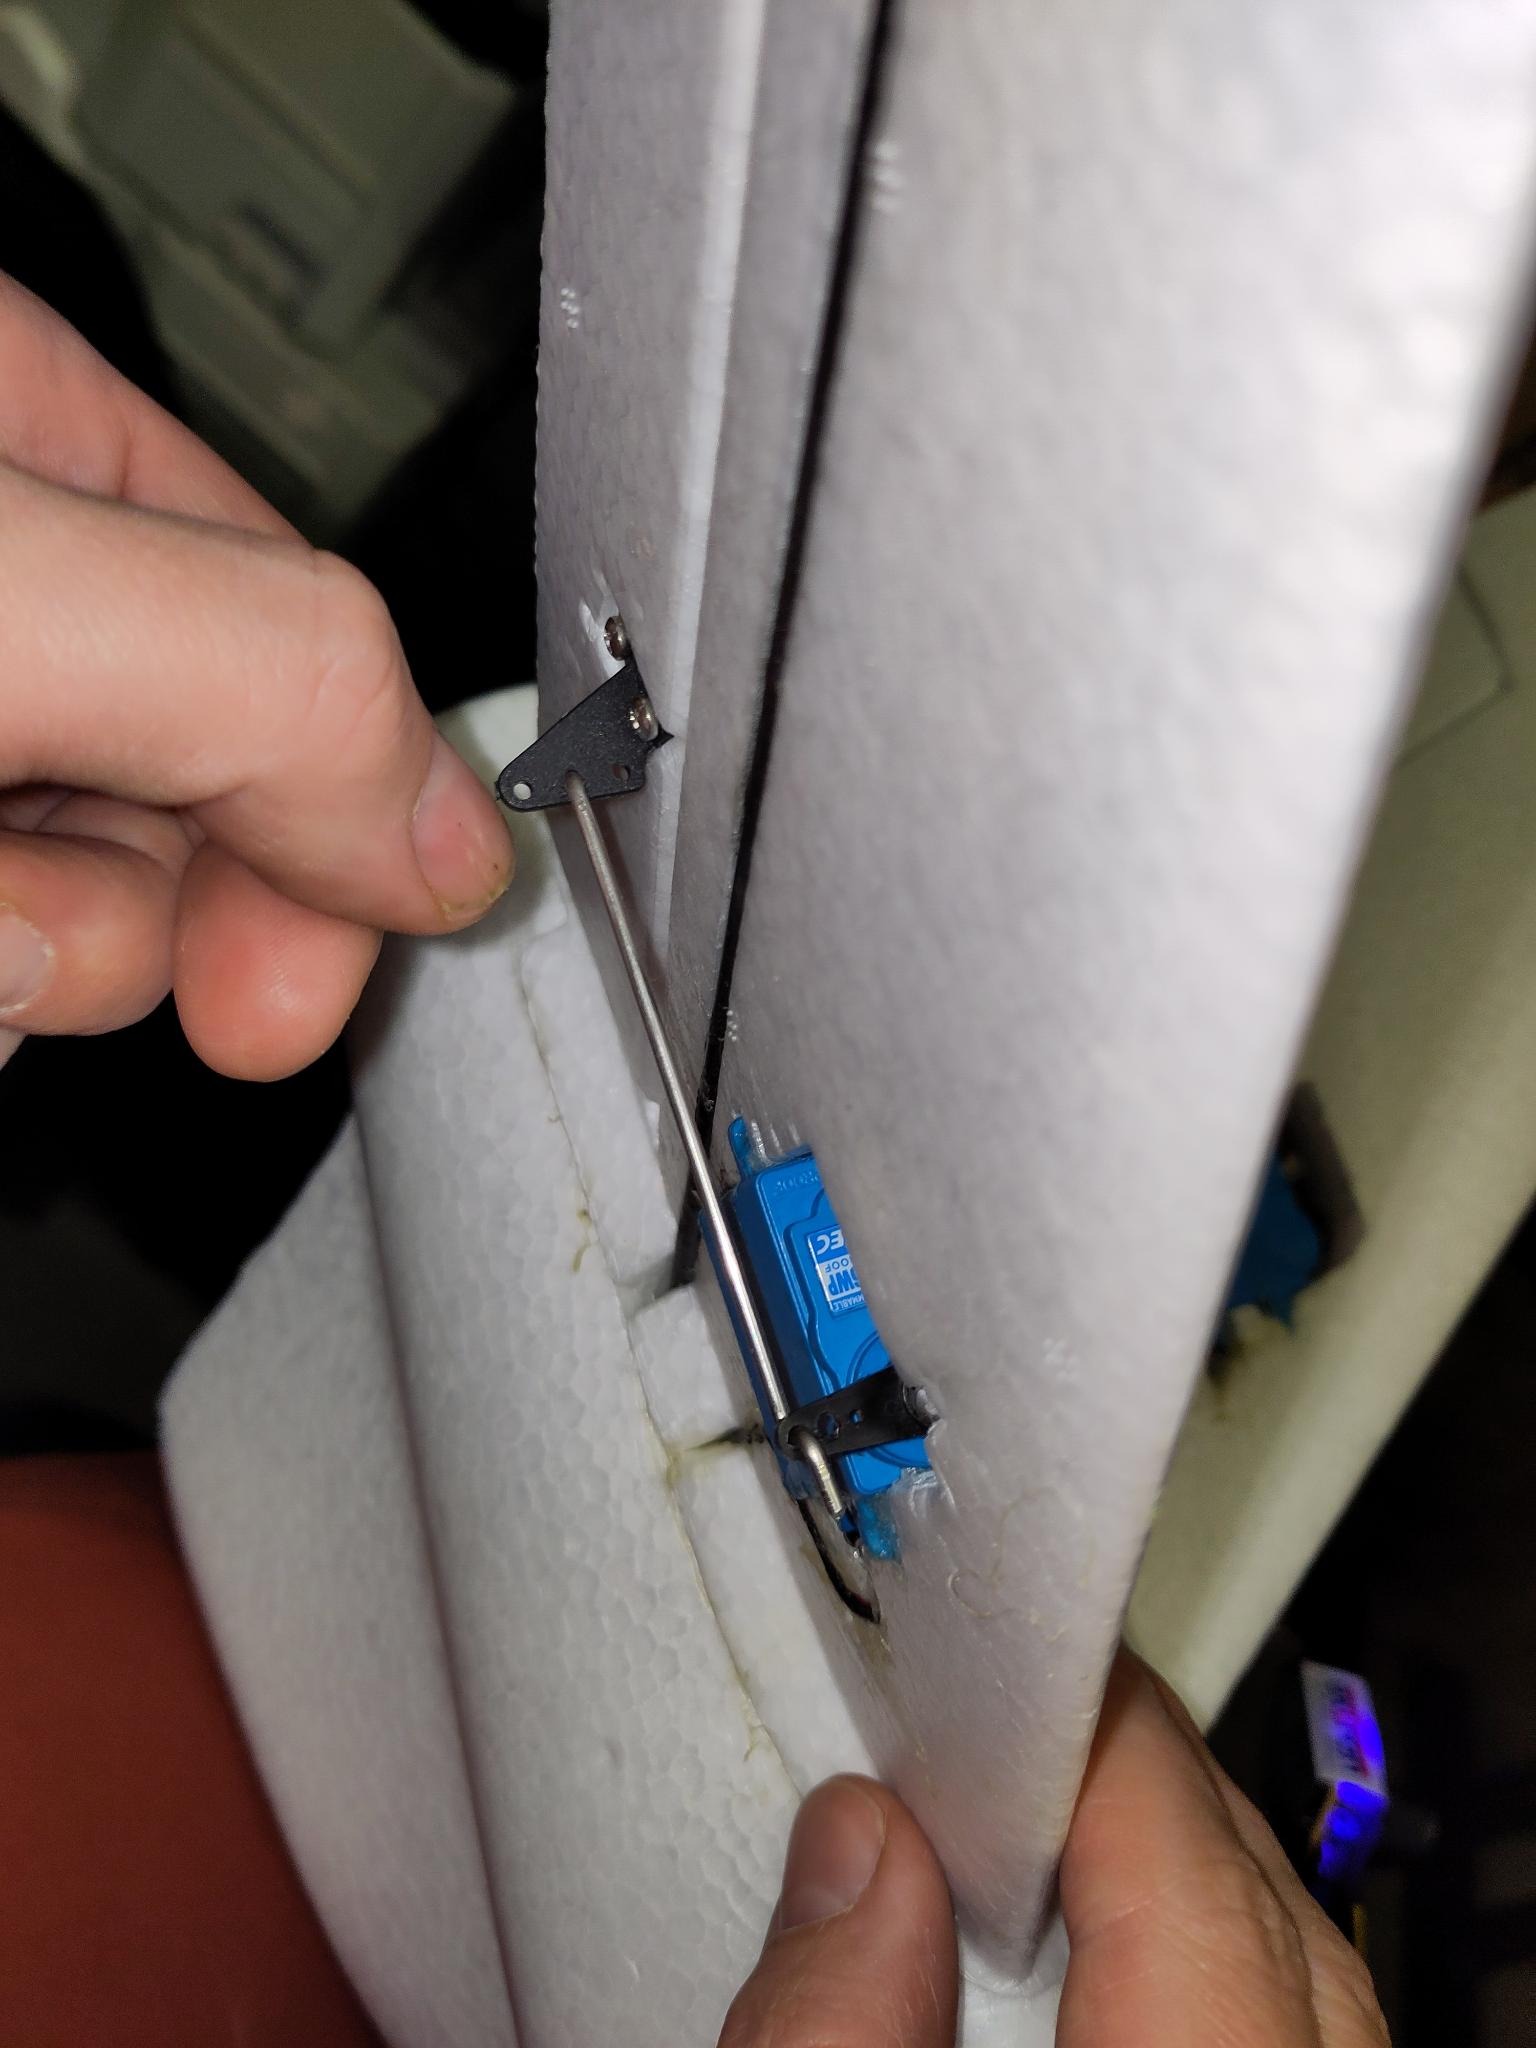
- Servo horn holes
- Use third hole in serve horn
- Use second hole in vtail holder
¶ Finalization & Testing
- are the carbon pipes glued in?
- do the servos work?
- are the cables and servos glued in?